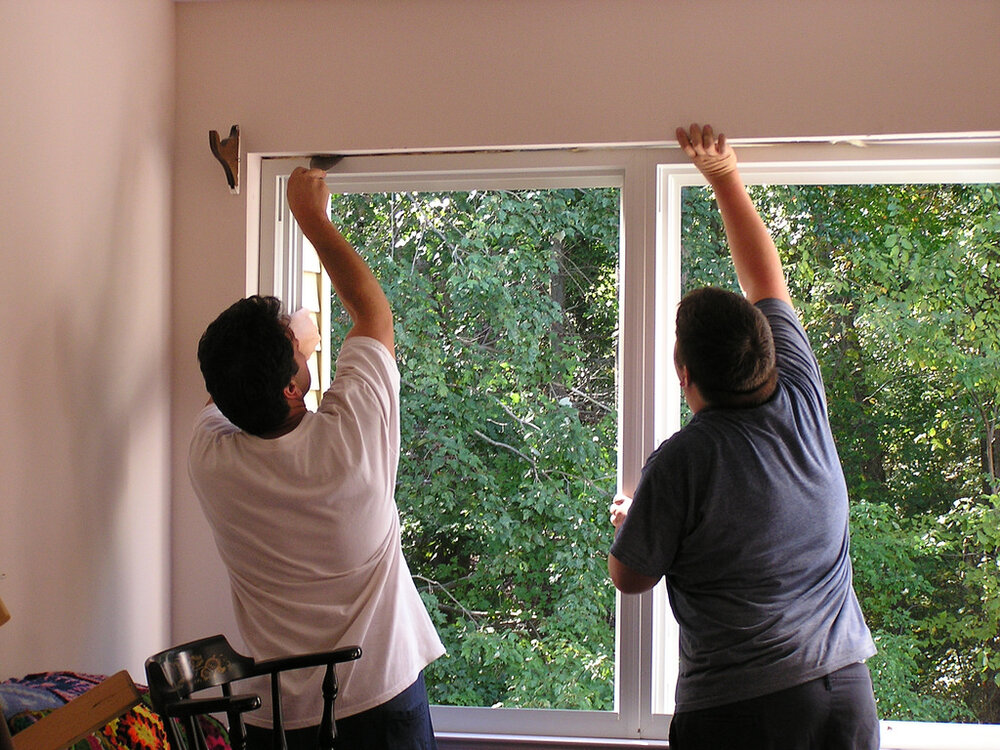
Ready to replace your old windows with new energy efficient units? We will show you the easiest way to pull out your old windows and install a new unit in place to provide the best energy efficiency. Here’s how to successfully install window replacements like a pro.
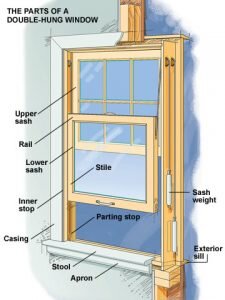
Step 1 – Know the window parts
Knowing the parts and components of a window is important. It will help you understand what to measure and understand how to seal your windows. Knowing the right dimensions of your existing window frame is essential before placing an order for window replacement. If you don’t, you might buy the wrong exterior trim or siding.
Step 2 – Measuring for replacements and interior wall surfaces
Measure it correctly and take all those numbers with you when you go shopping.
Inside width x inside height x inside diagonalOpening width x opening height x outside diagonal
Here’s how to measure:
Start by mapping the inside width of the old window frame, edge to edge, in three places: across the Top, center, and base. Write down the smallest of the three measurements. Next, measure the inside frame’s height from the base to the underside of the top jamb in three places: at the left jamb, in the middle, and at the right of the jamb. Again, record the smallest measurement. Check the squareness of the frame by measuring the diagonals from edge to edge. The two dimensions should be identical. If the frame is out of square by 1/4 inch or so, don’t worry; the replacement can be filled to fit. Anything excess may need adjustments to the frame. If the frame is so out of bang that a square replacement wouldn’t look appropriate, you’ll need a full-frame restoration. Finally, use an angle-measuring tool to define the slope of the sill; some replacements come with a selection of beam angles.
Step 3 – Remove Old Window
Utilizing a crowbar, remove all the window casing, along with the trim and sill plate.
Step 4 – Adjust the Window Frame
After discharging the window casing make sure the headers and studs are plumb and square, and the frame equals the dimension of the new window. This may require appending new boards to the frame as well as removing part of the siding on the exterior. Allow about a 1/4 inch gap on all sides for additional adjustments and insulation.
Step 5 – Install and Wrap the New Window
If a part of the outside siding had to be removed, be sure to put felt wrap back up to retain moisture out. Then apply window wrap to the exterior framing of the window. Begin the window cover installation at the base of the window and work your way up. Install the window from the exterior by pushing the window up until it is flush with the frame. Fasten your window into place; be sure you can anchor it to a solid piece of wood. Adjust the window until it is plumb and square by managing the screws and adding shims to areas that need adjustment. Once the window is in the correct position, from the exterior, use screws or nails to secure it into place. Once your window is plumb, square and nailed into place, add an extra layer of window wrap surrounding the fins of the window. Make sure you overlay the wrap and completely cover the coverings. Do not let the lid crinkle or fold back on itself. It is a fundamental component to keeping moisture out, so it must remain straight and flush to the window frame.
Step 6 – Insulate The Window
Protect the window by putting expanding foam sealant in the gap between the casing and the window. Cover the edges of the window with painter’s tape to protect the surface, once the foam dries it has to be scraped off with a knife. Don’t add too much foam because it will bow the window and disable it from working.
Step 7 – Replace Trim and Casing
After the foam dries, cut away the waste and place a new interior casing. Replace exterior trim if needed. If you are having second thoughts, you can always contact your local window professionals for assistance. Eden Windows and Doors specialists are always a click and a call away.

